

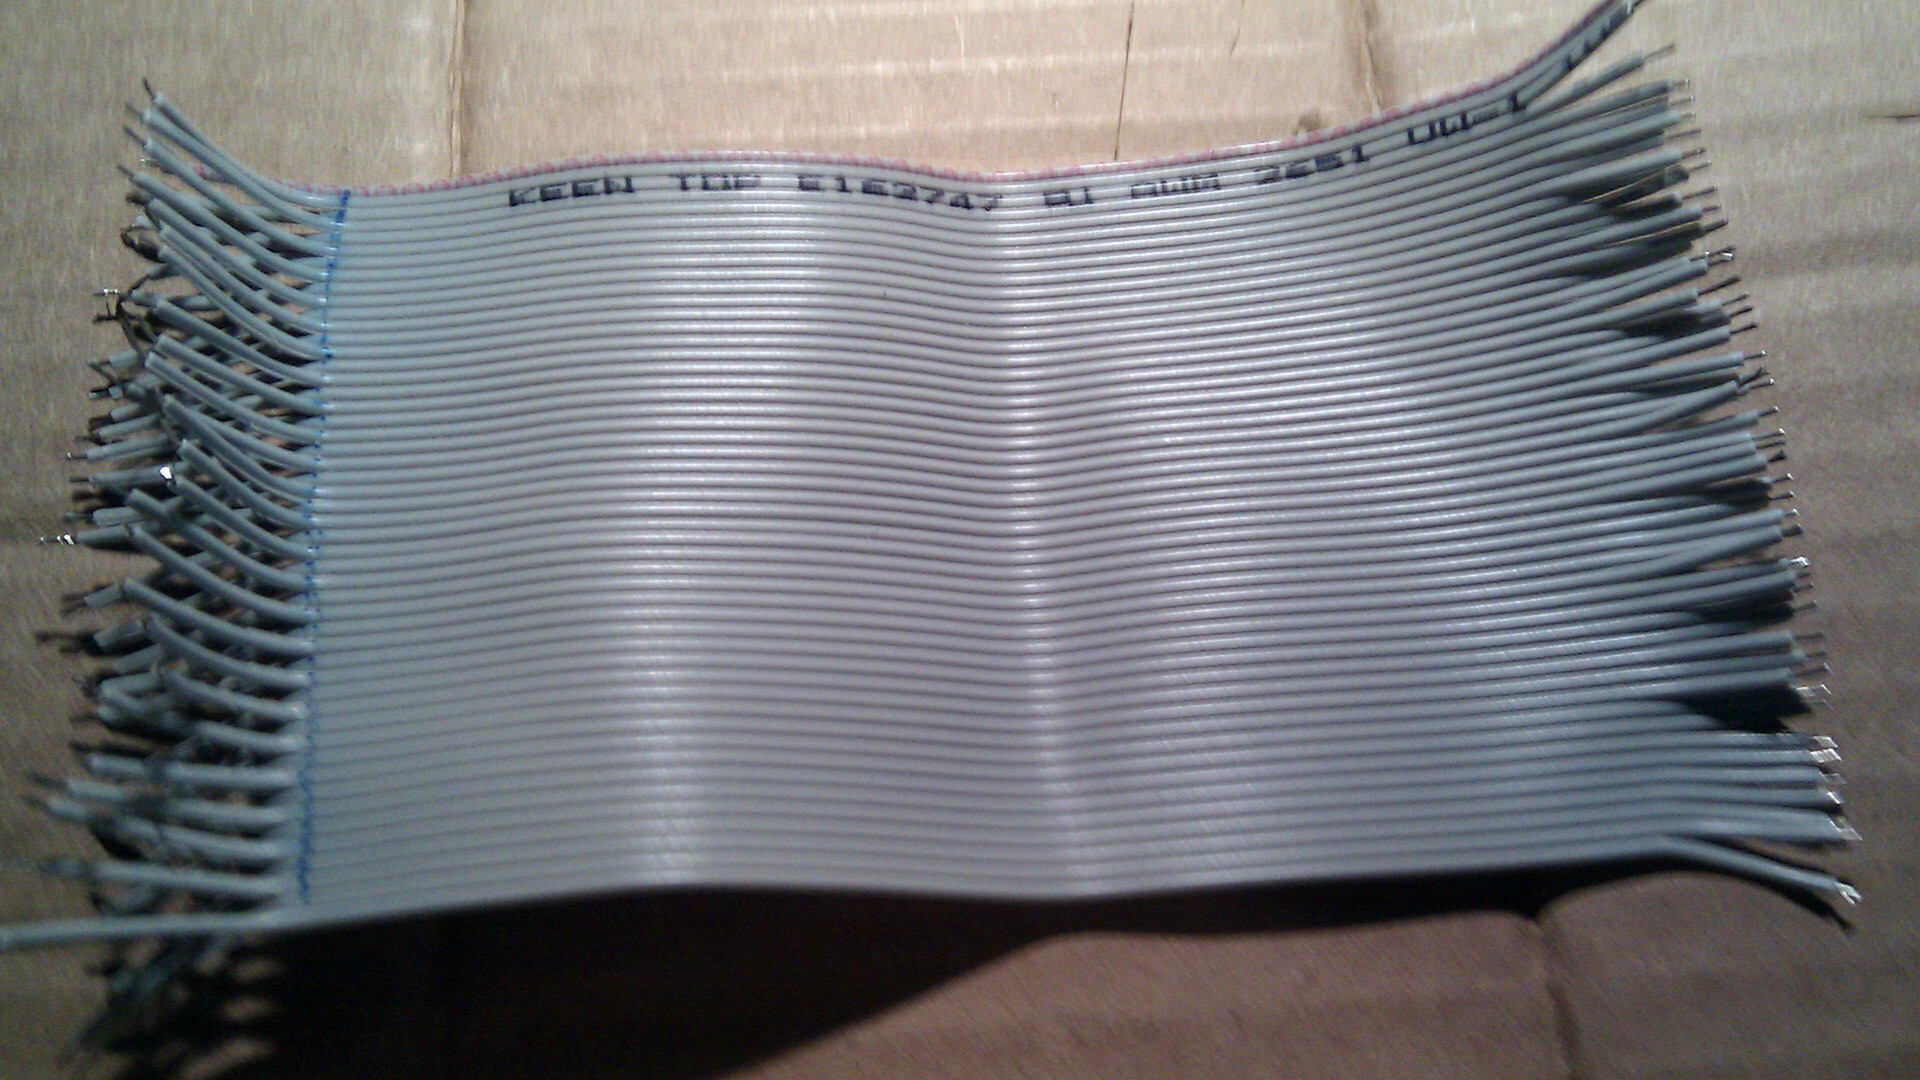
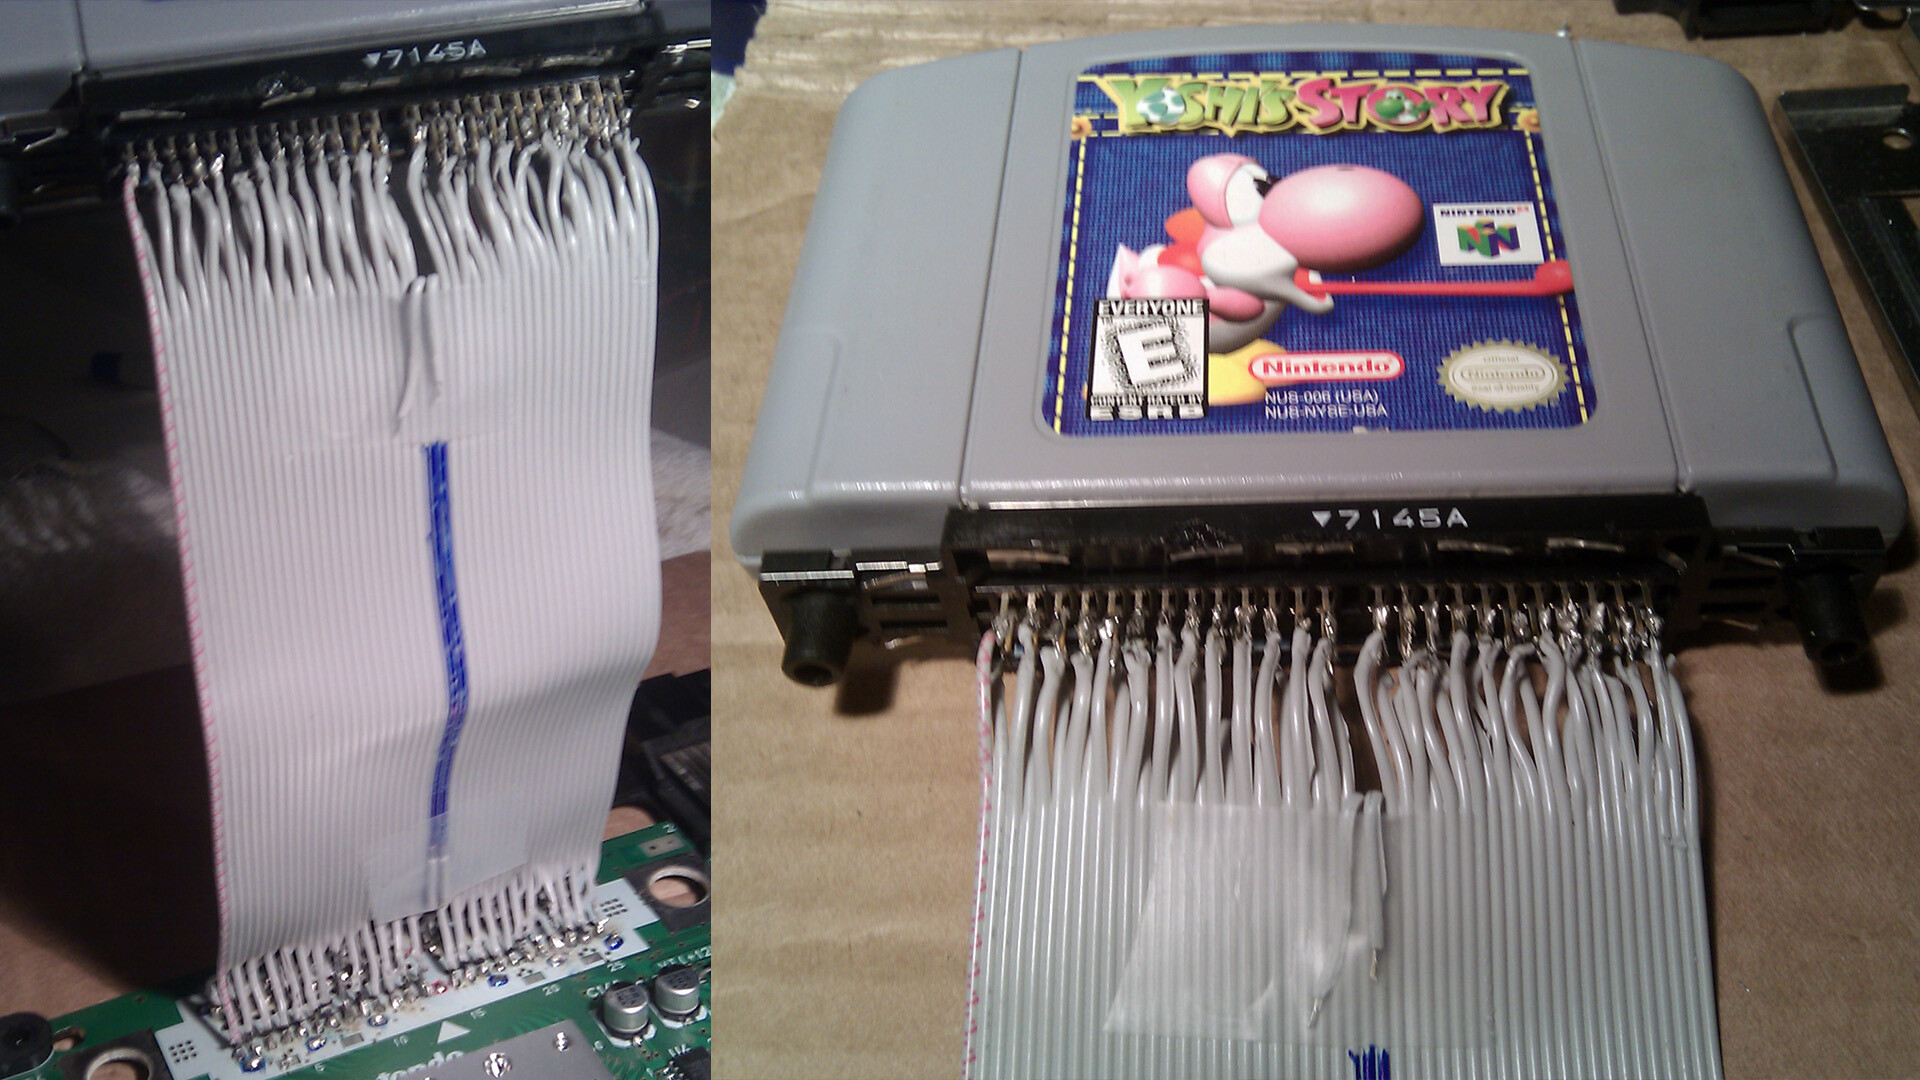
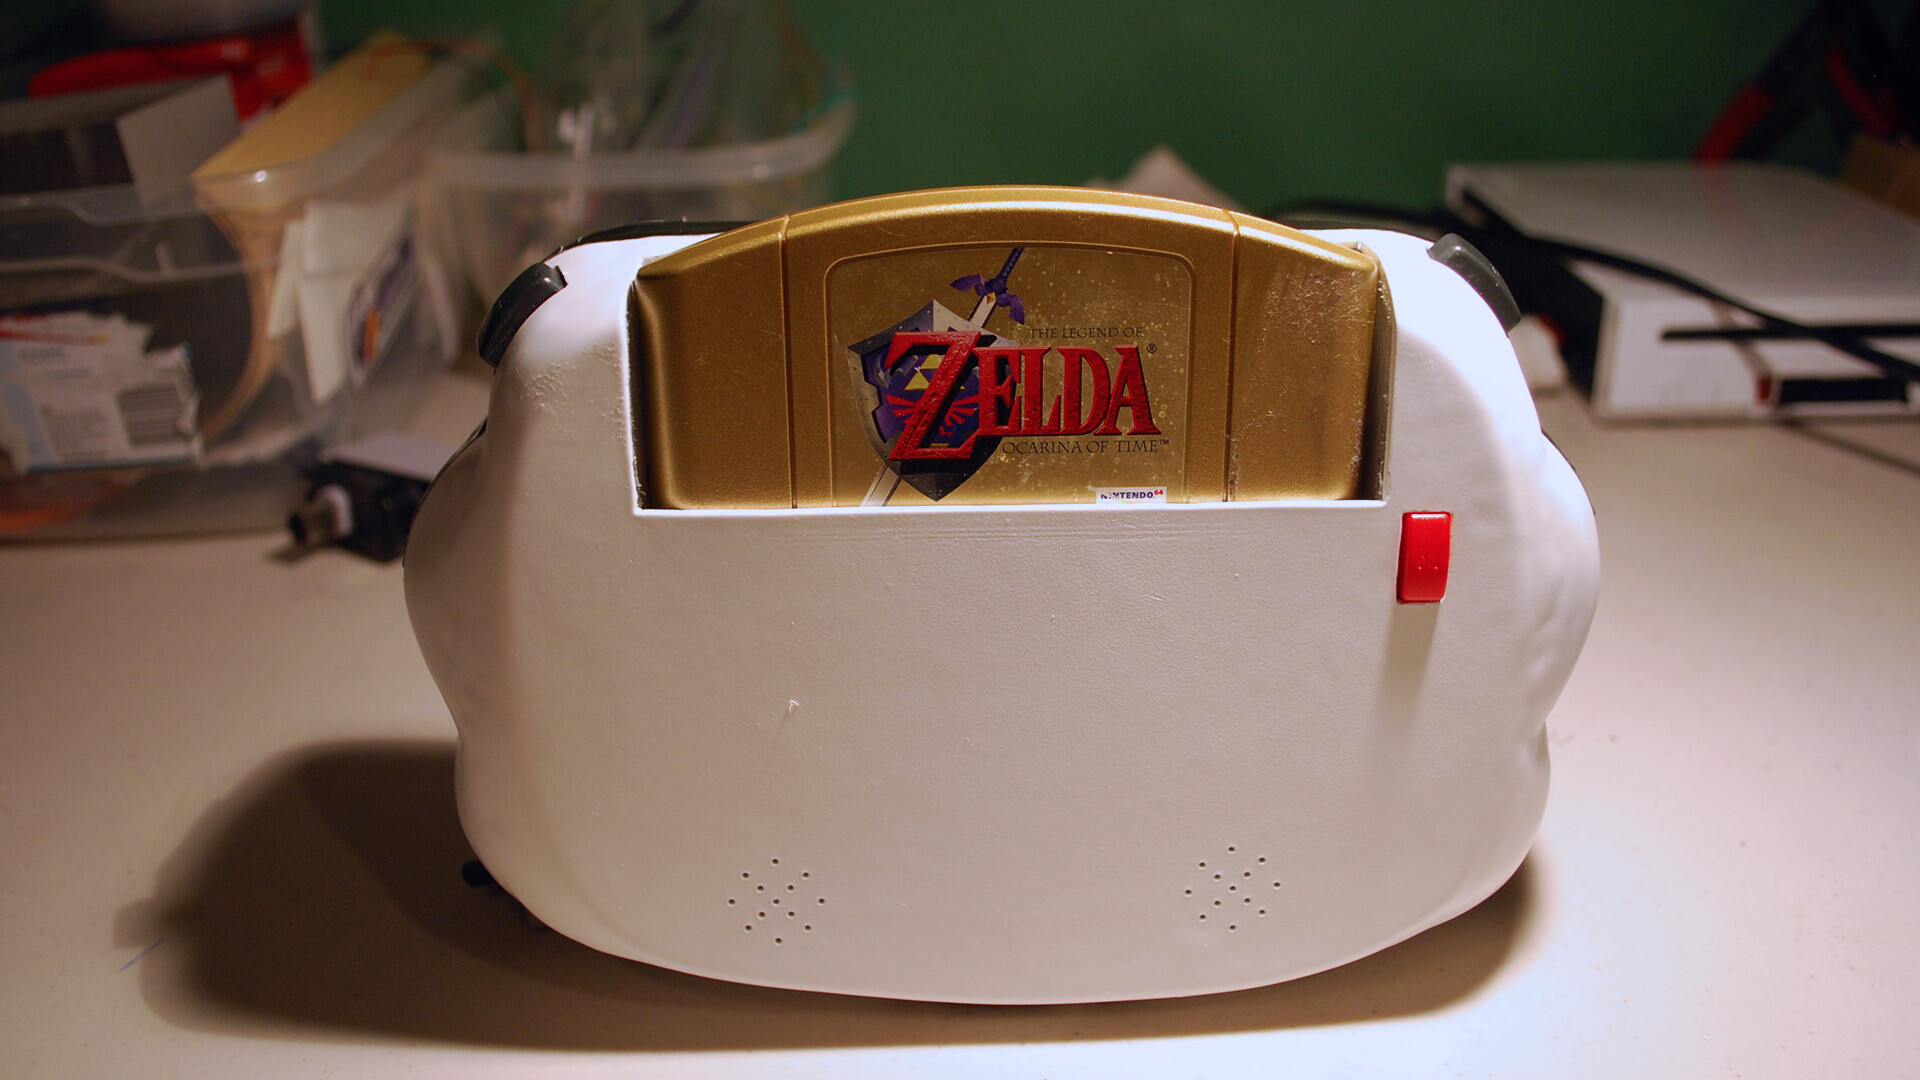
I used a cropped IDE cable to rewire the pins of the cartridge slot, which needed to be parallel (like a gameboy) to the board instead of perpendicular. This required finely soldering the connections on both ends of the cable. The IDE cable kept things or

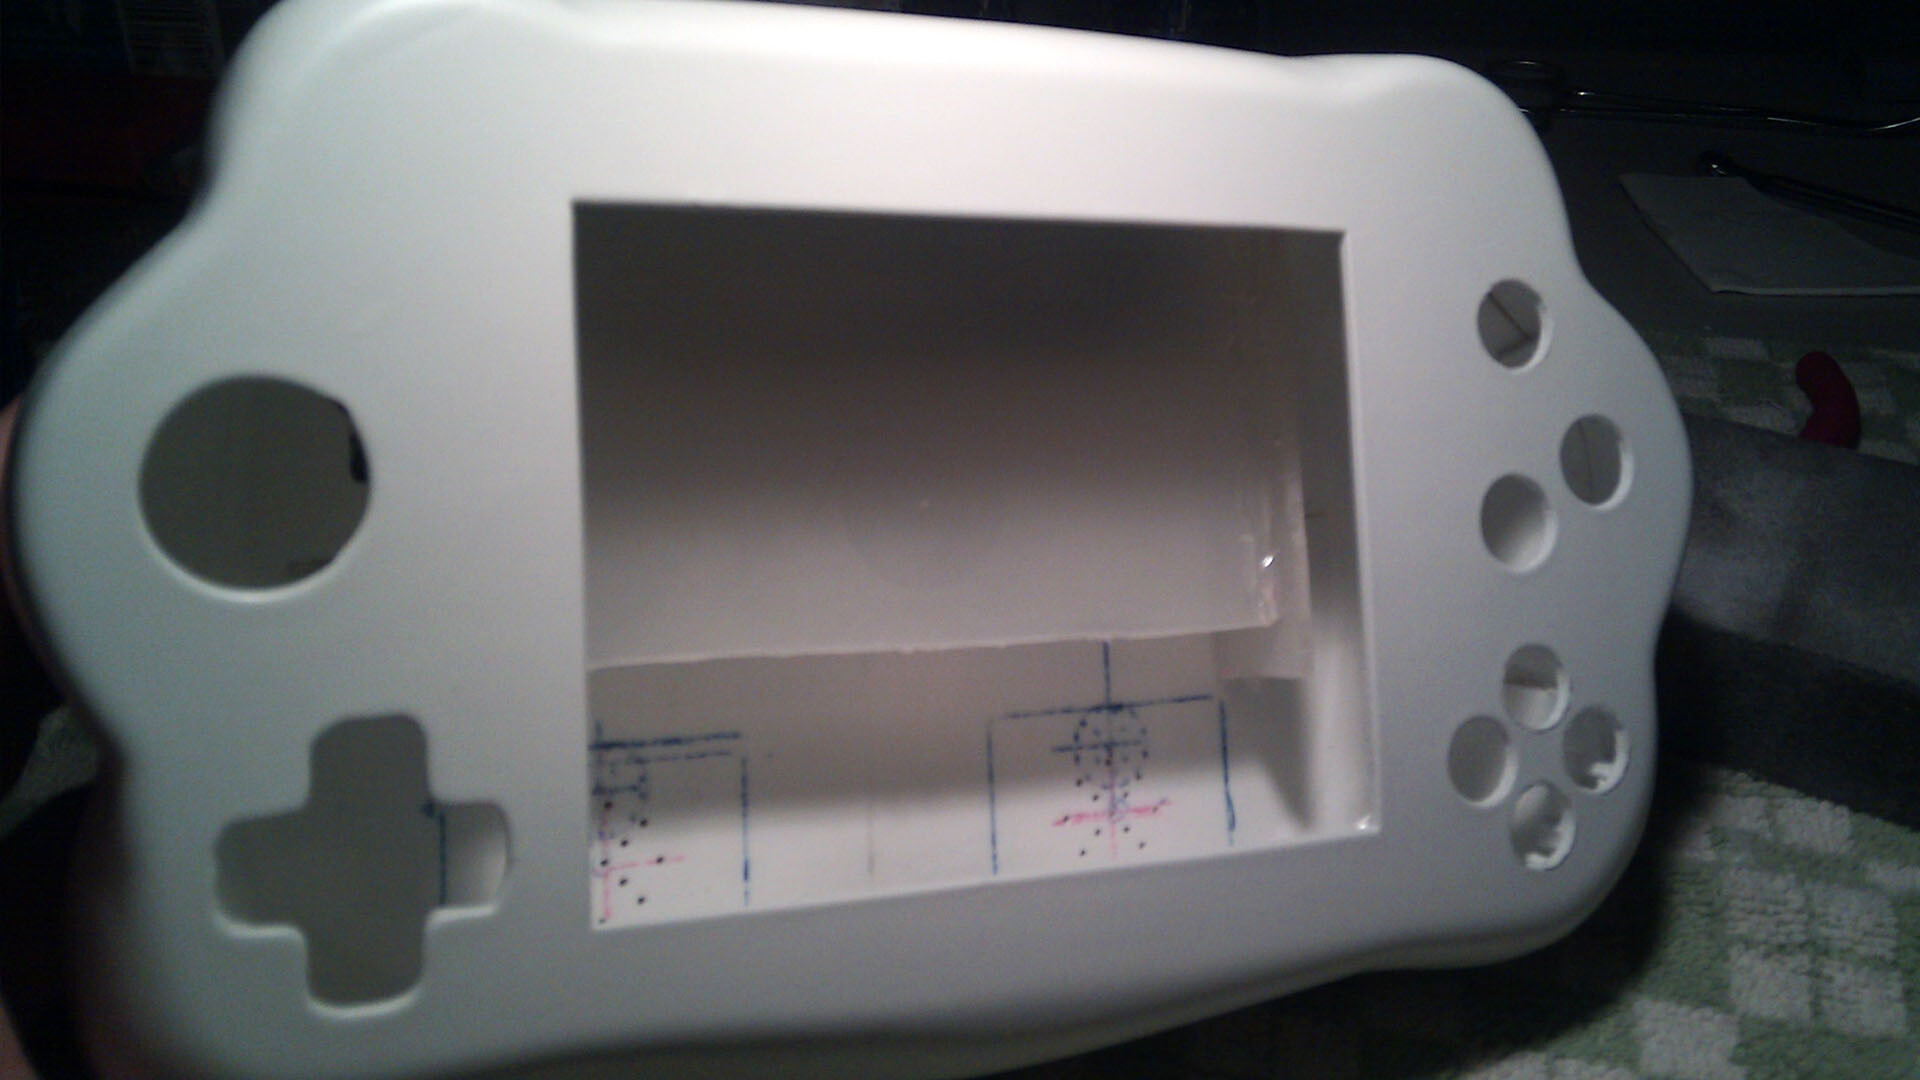
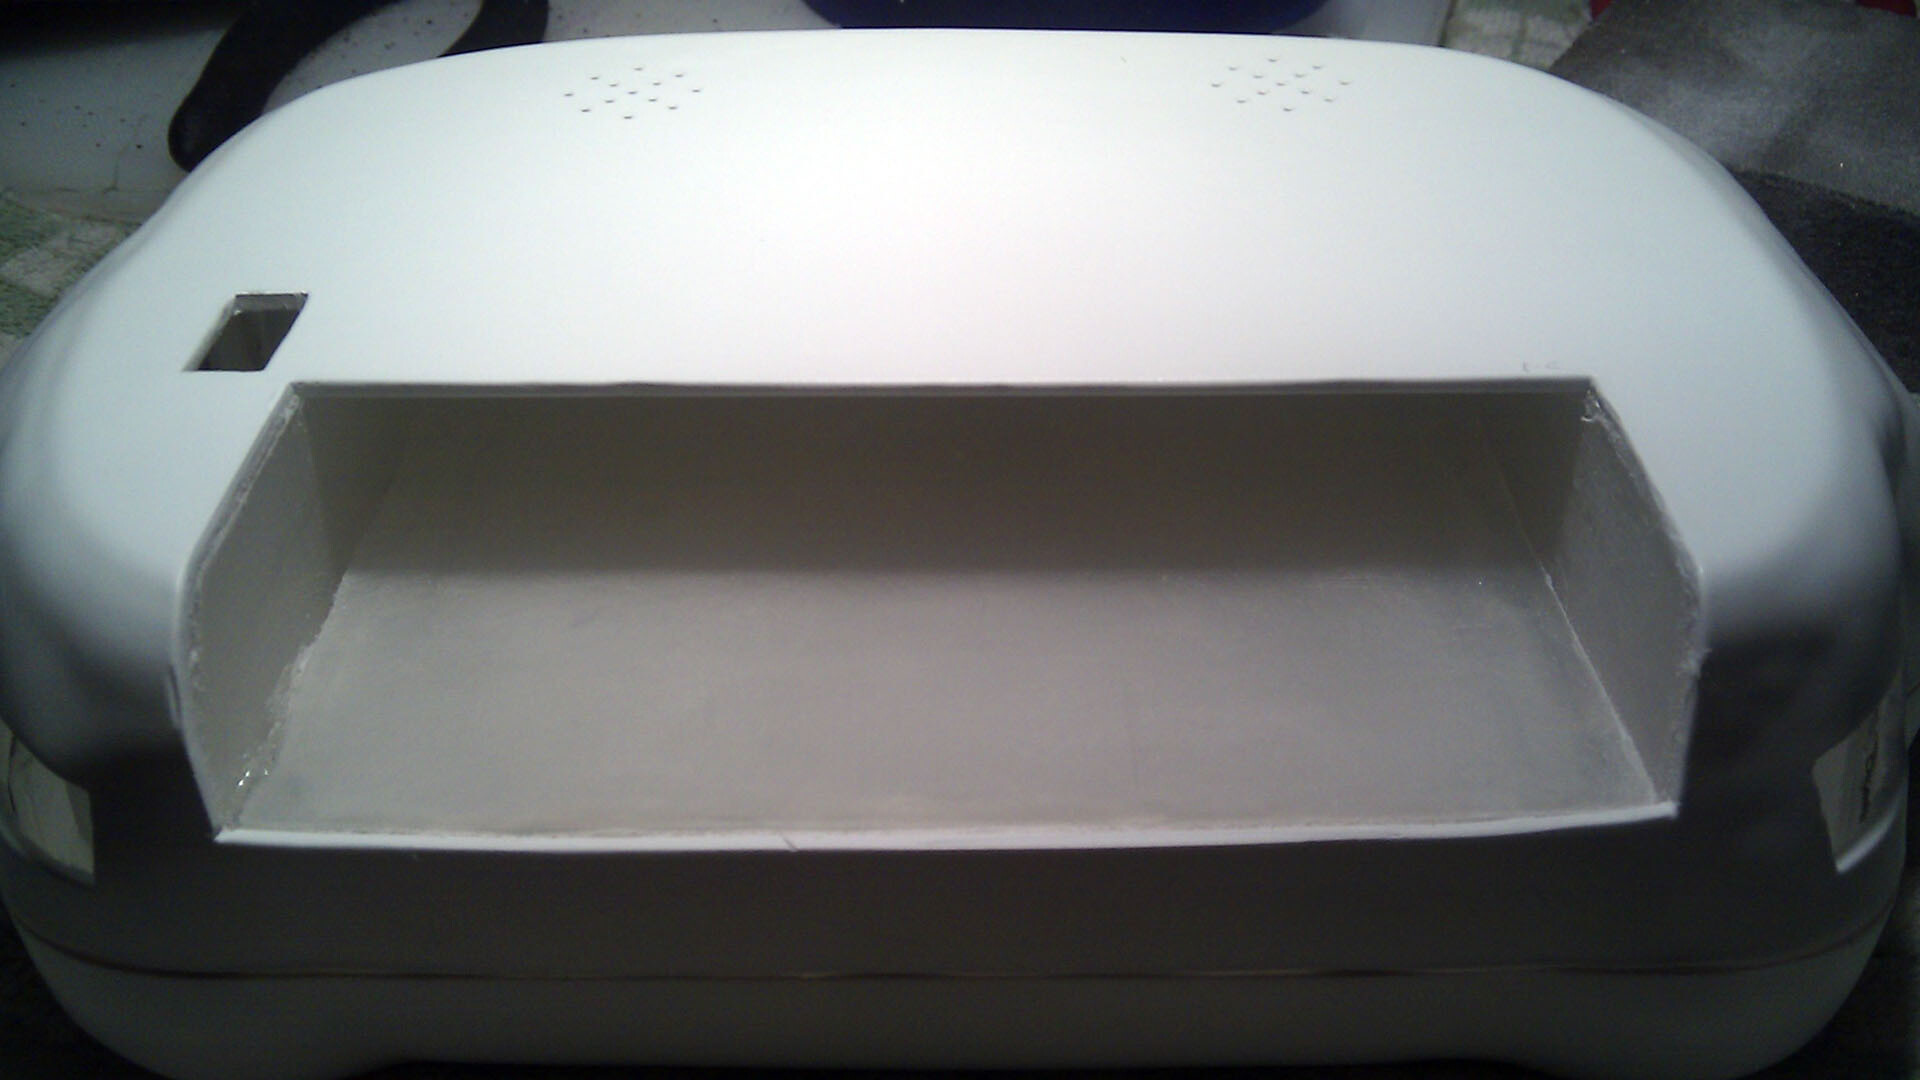
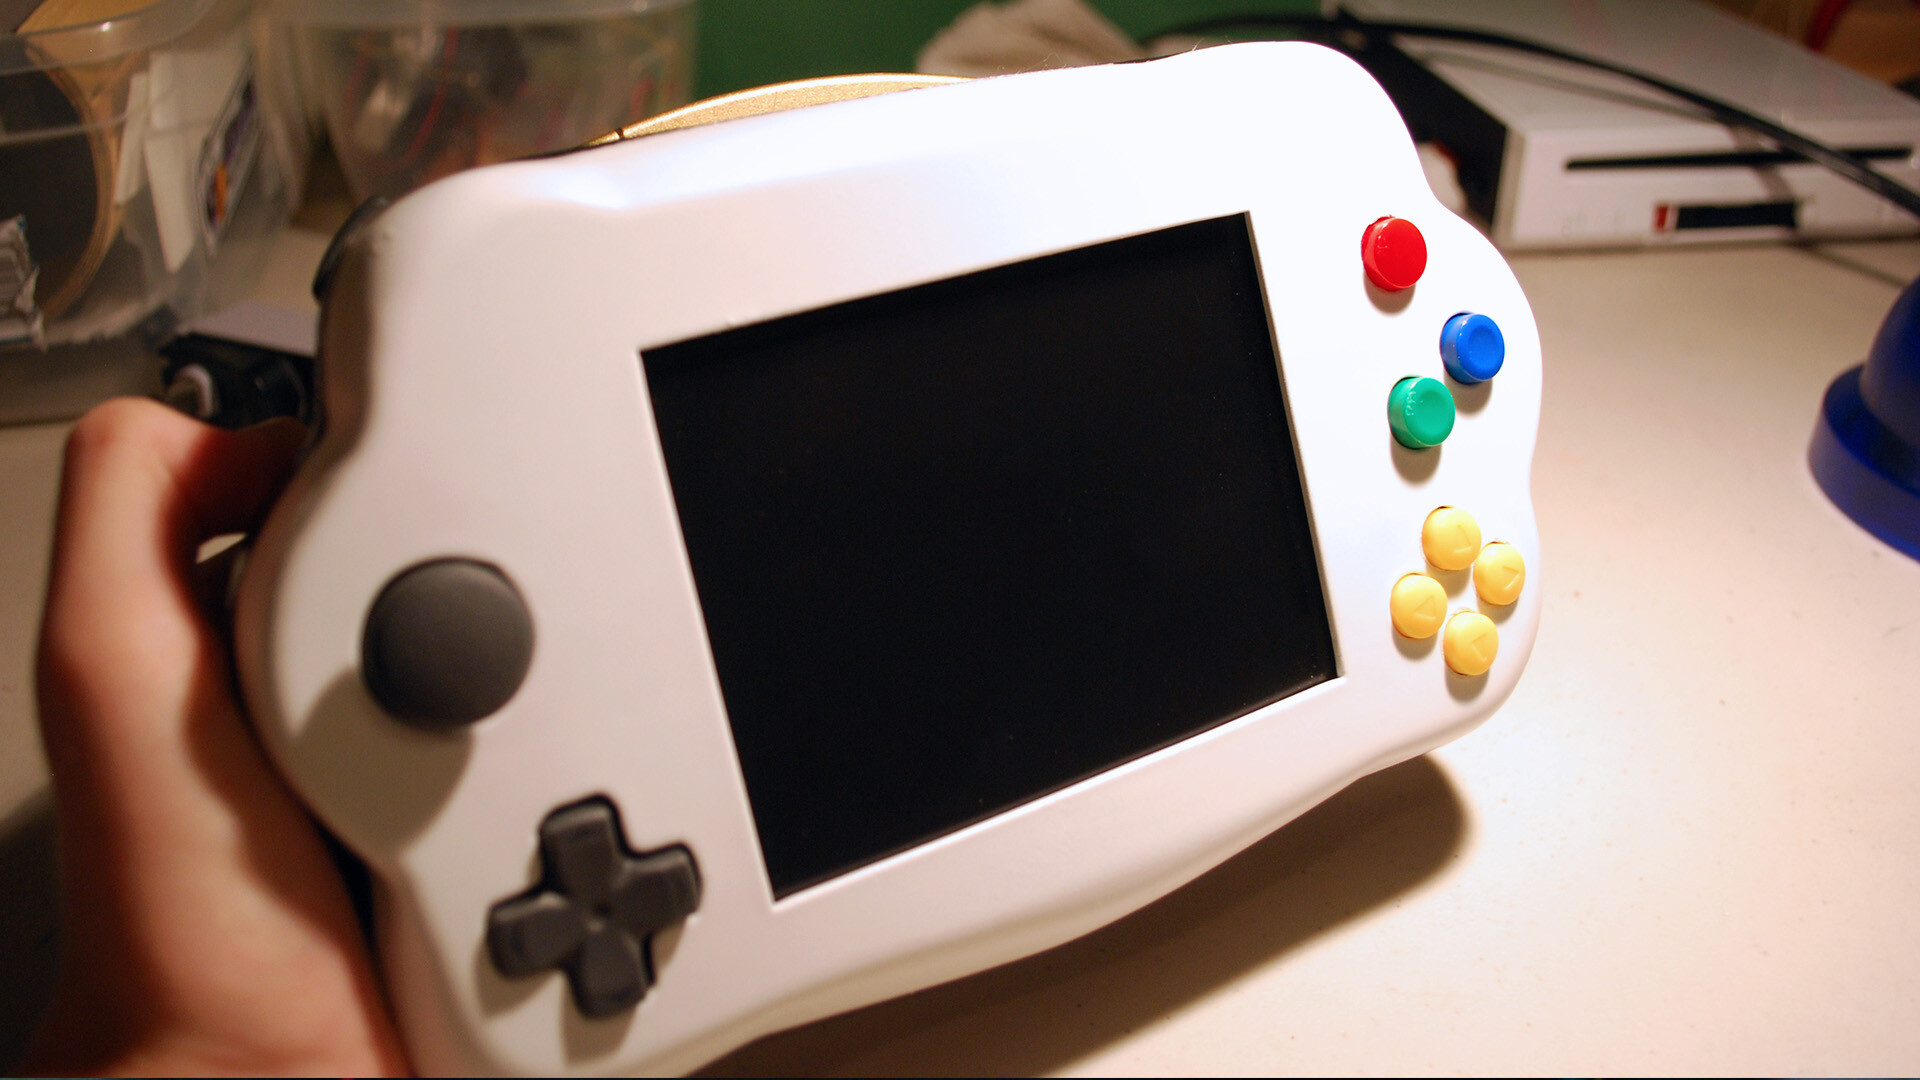
I created the cartridge slot using cut tupperware plastic. The case design used teeth to secure the connection between the front/back half. The buttons were mounted into the case front, and their connections exposed through the back of the plastic support
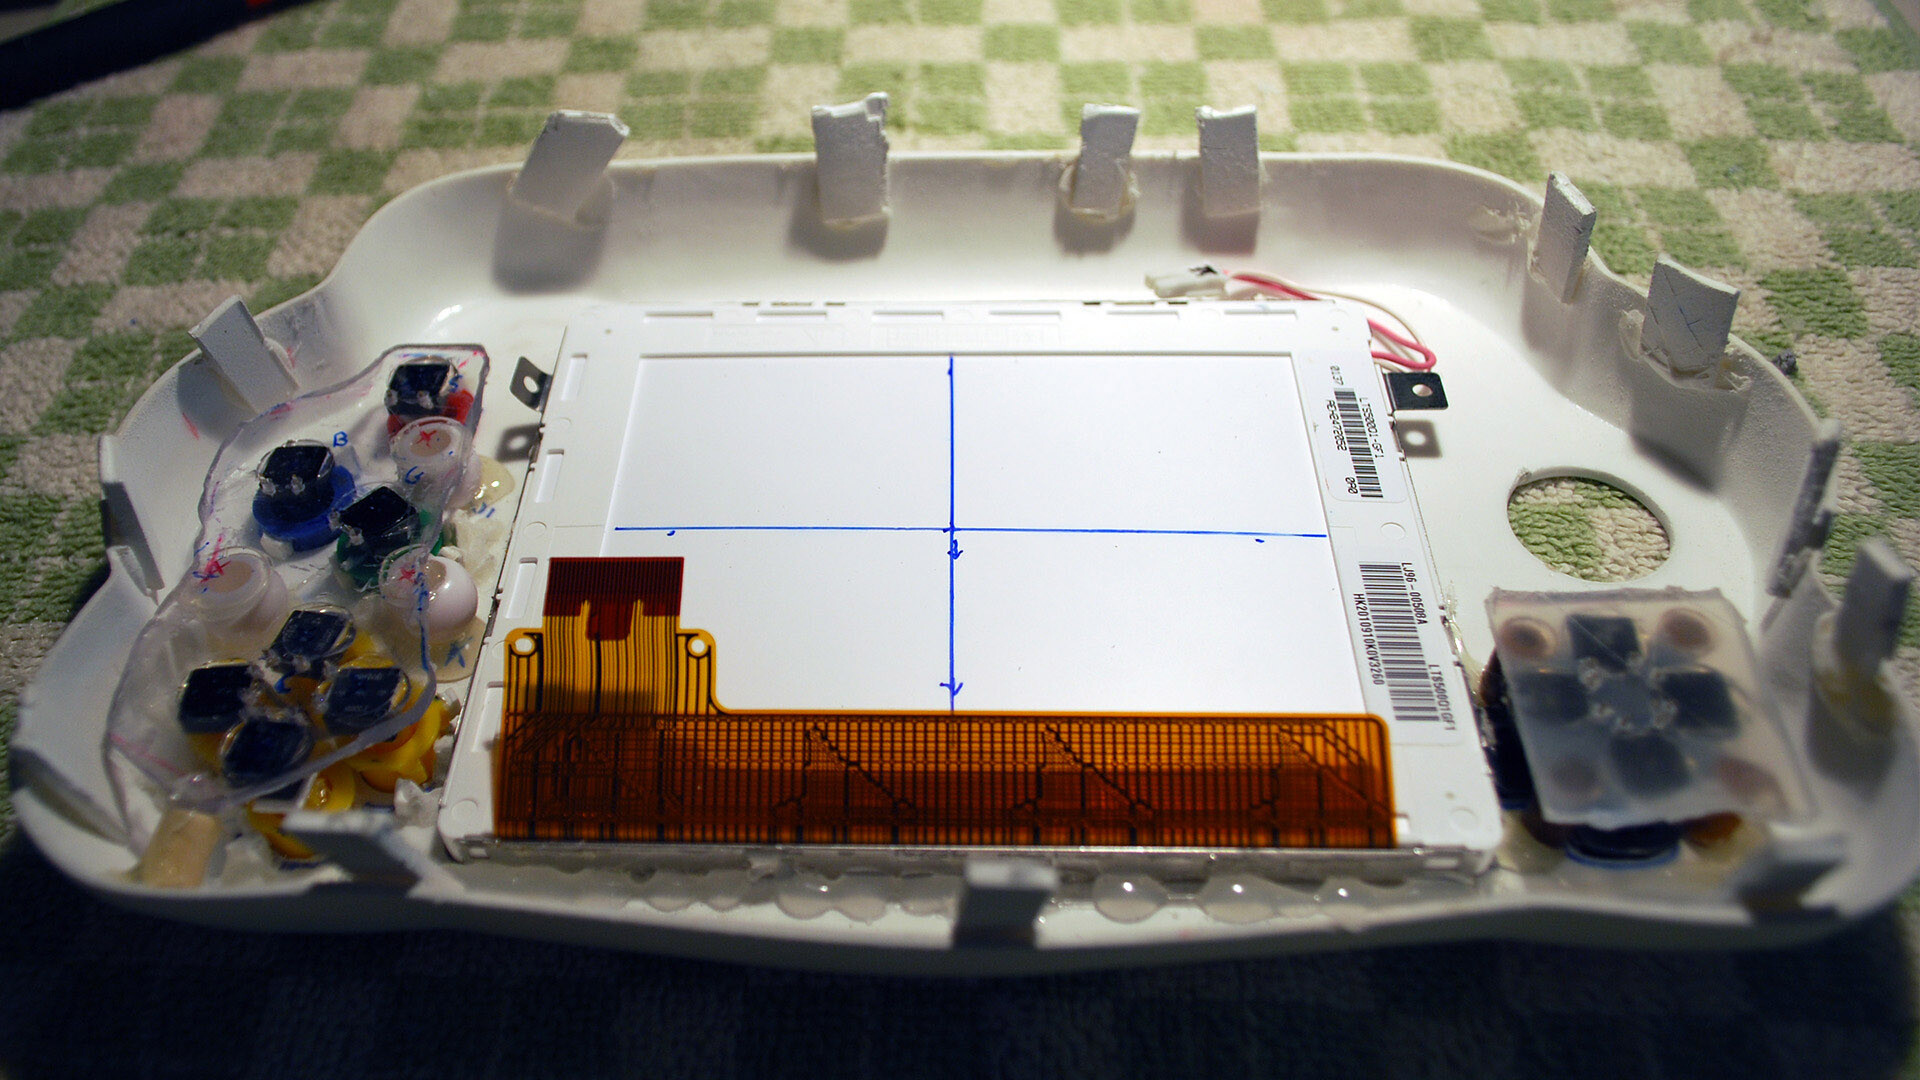
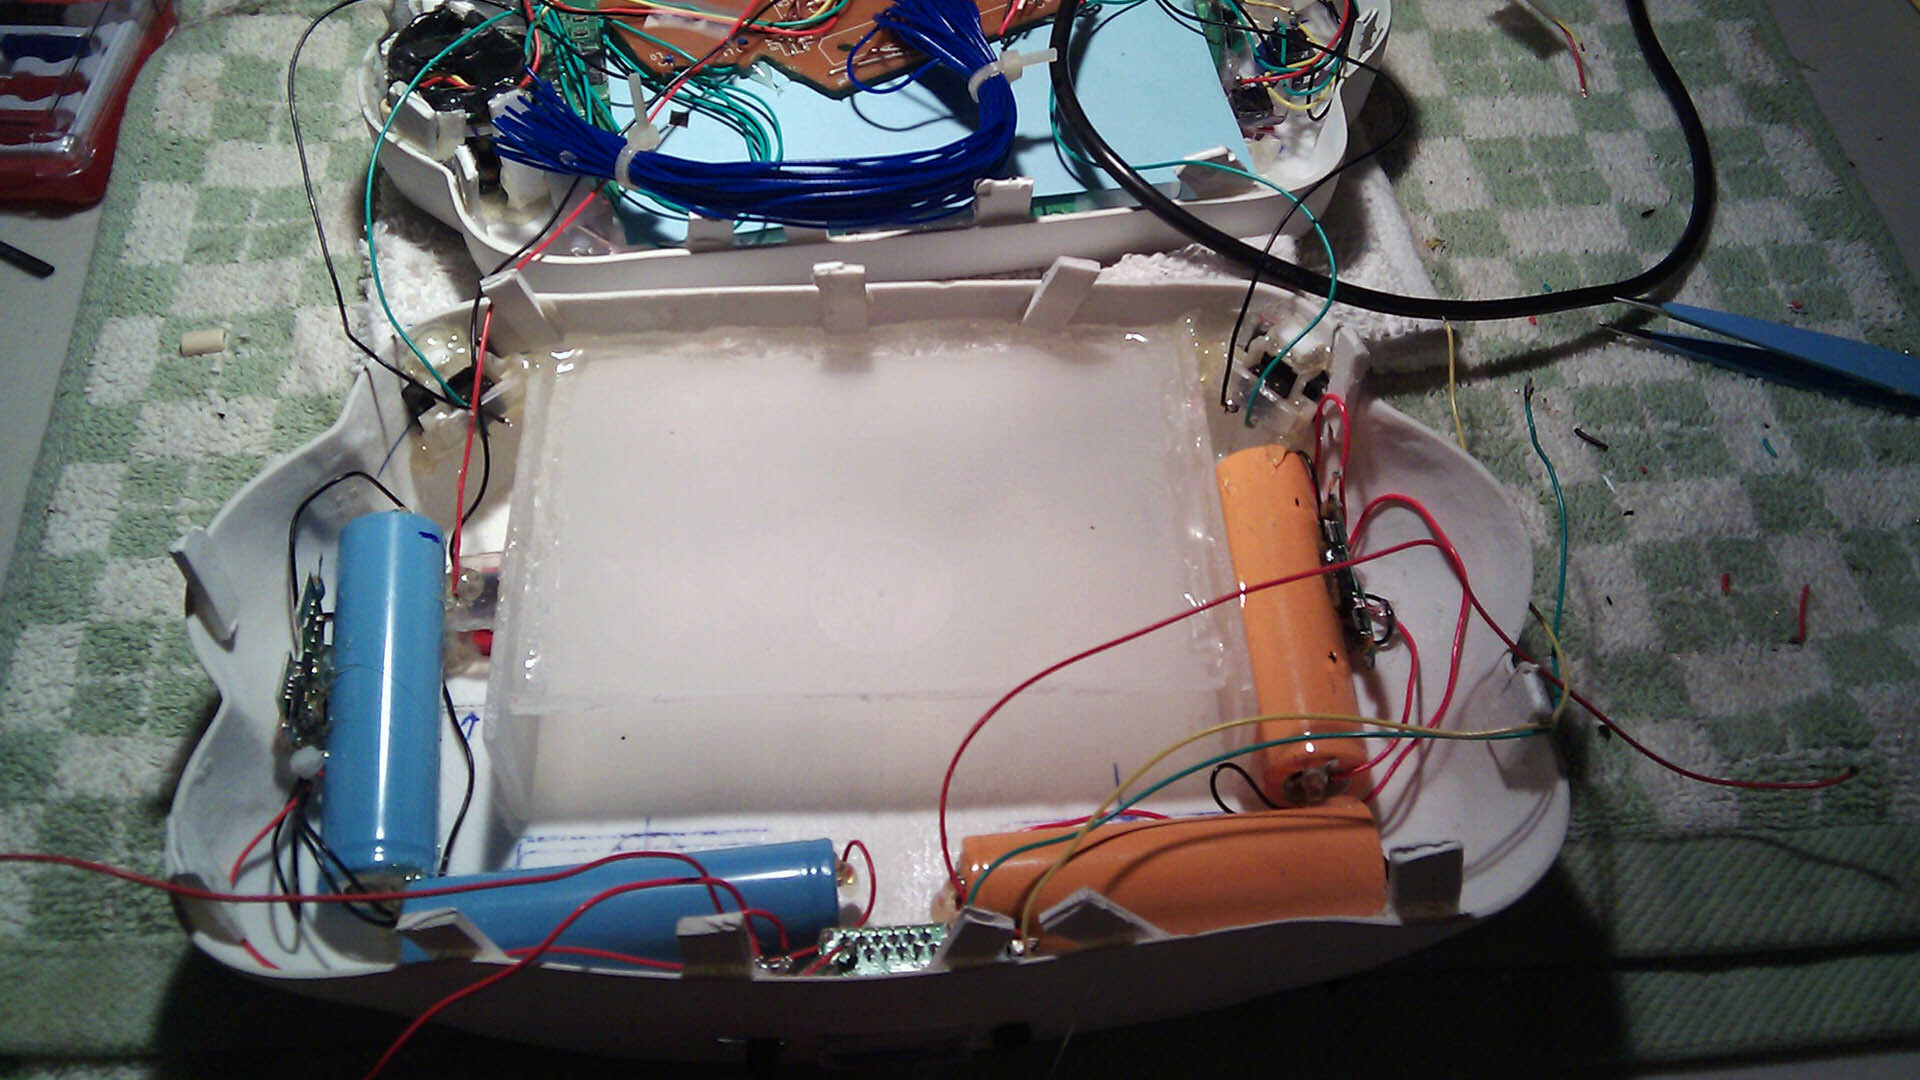
You can see the buttons +/- wires connected, and the screen mainboard is mounted with a plastic insulating layer on top. In the back, the batteries are glued in and wired.


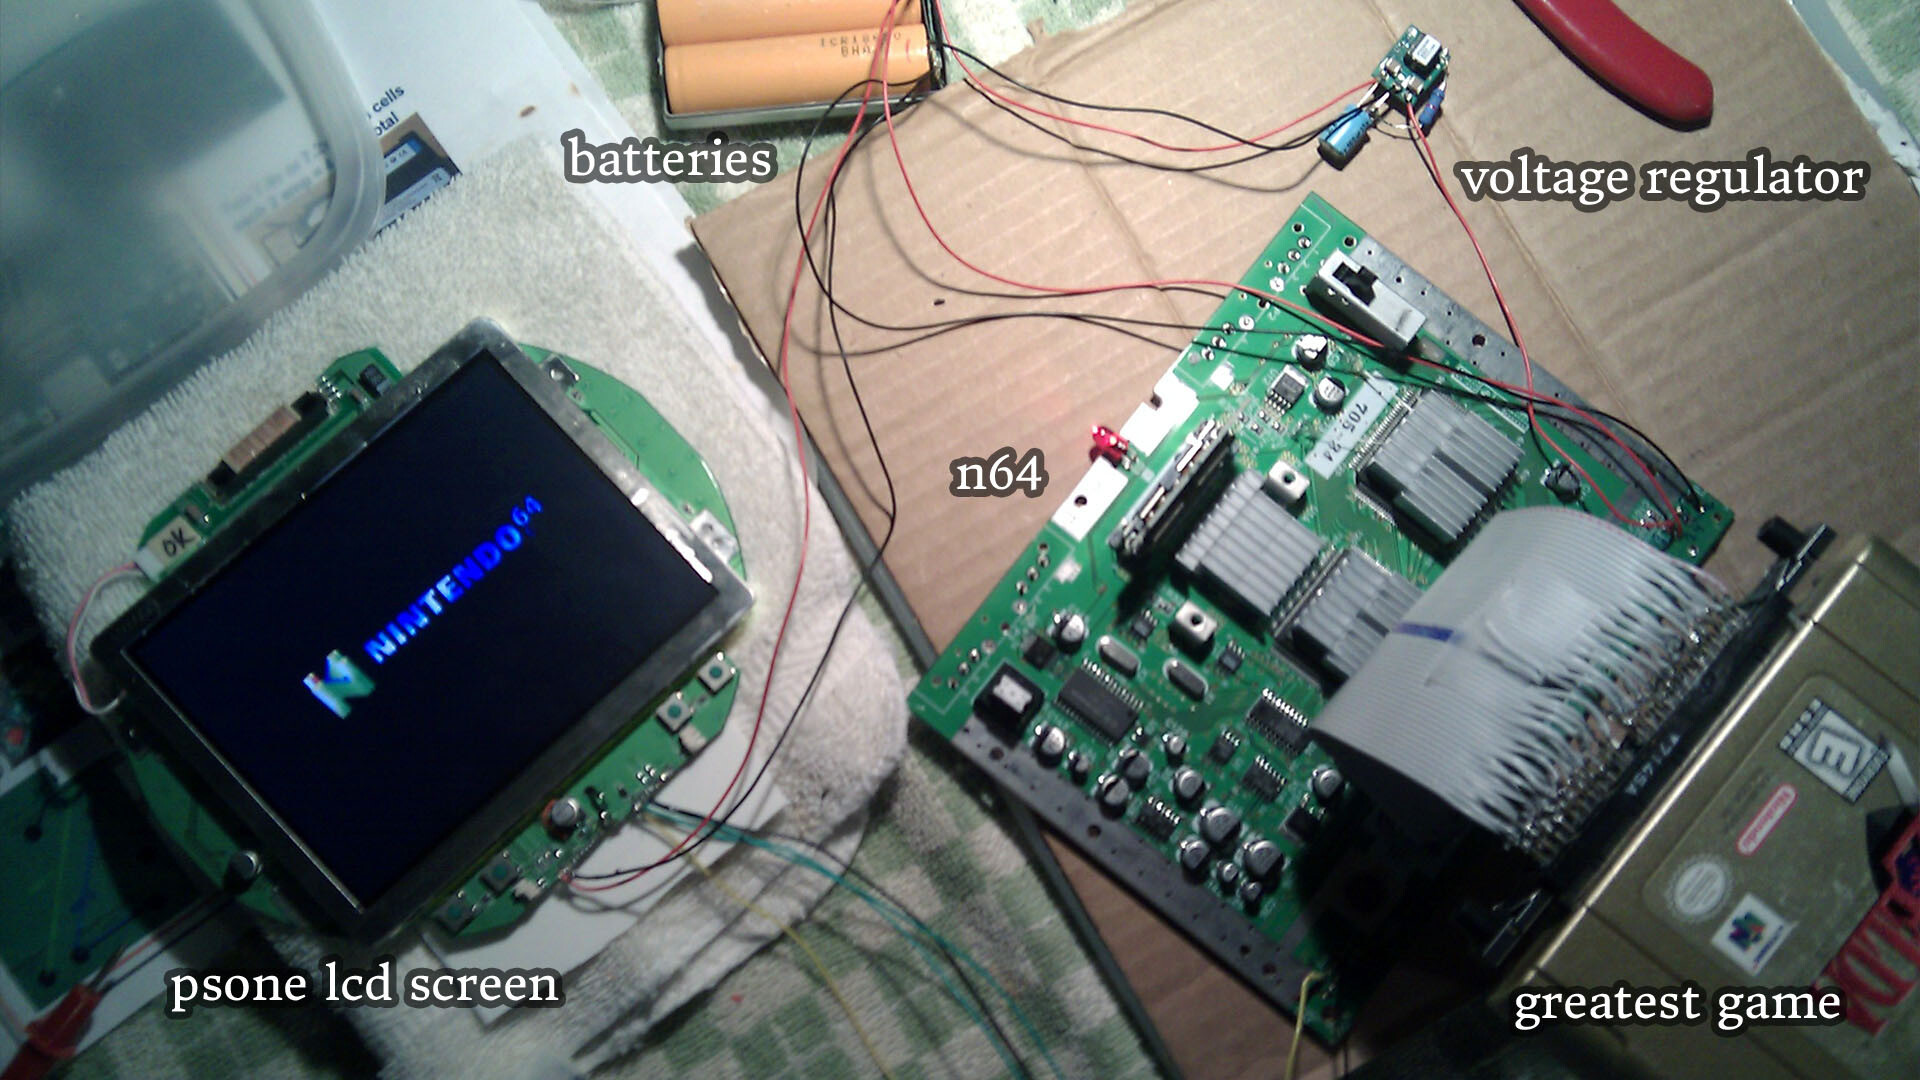
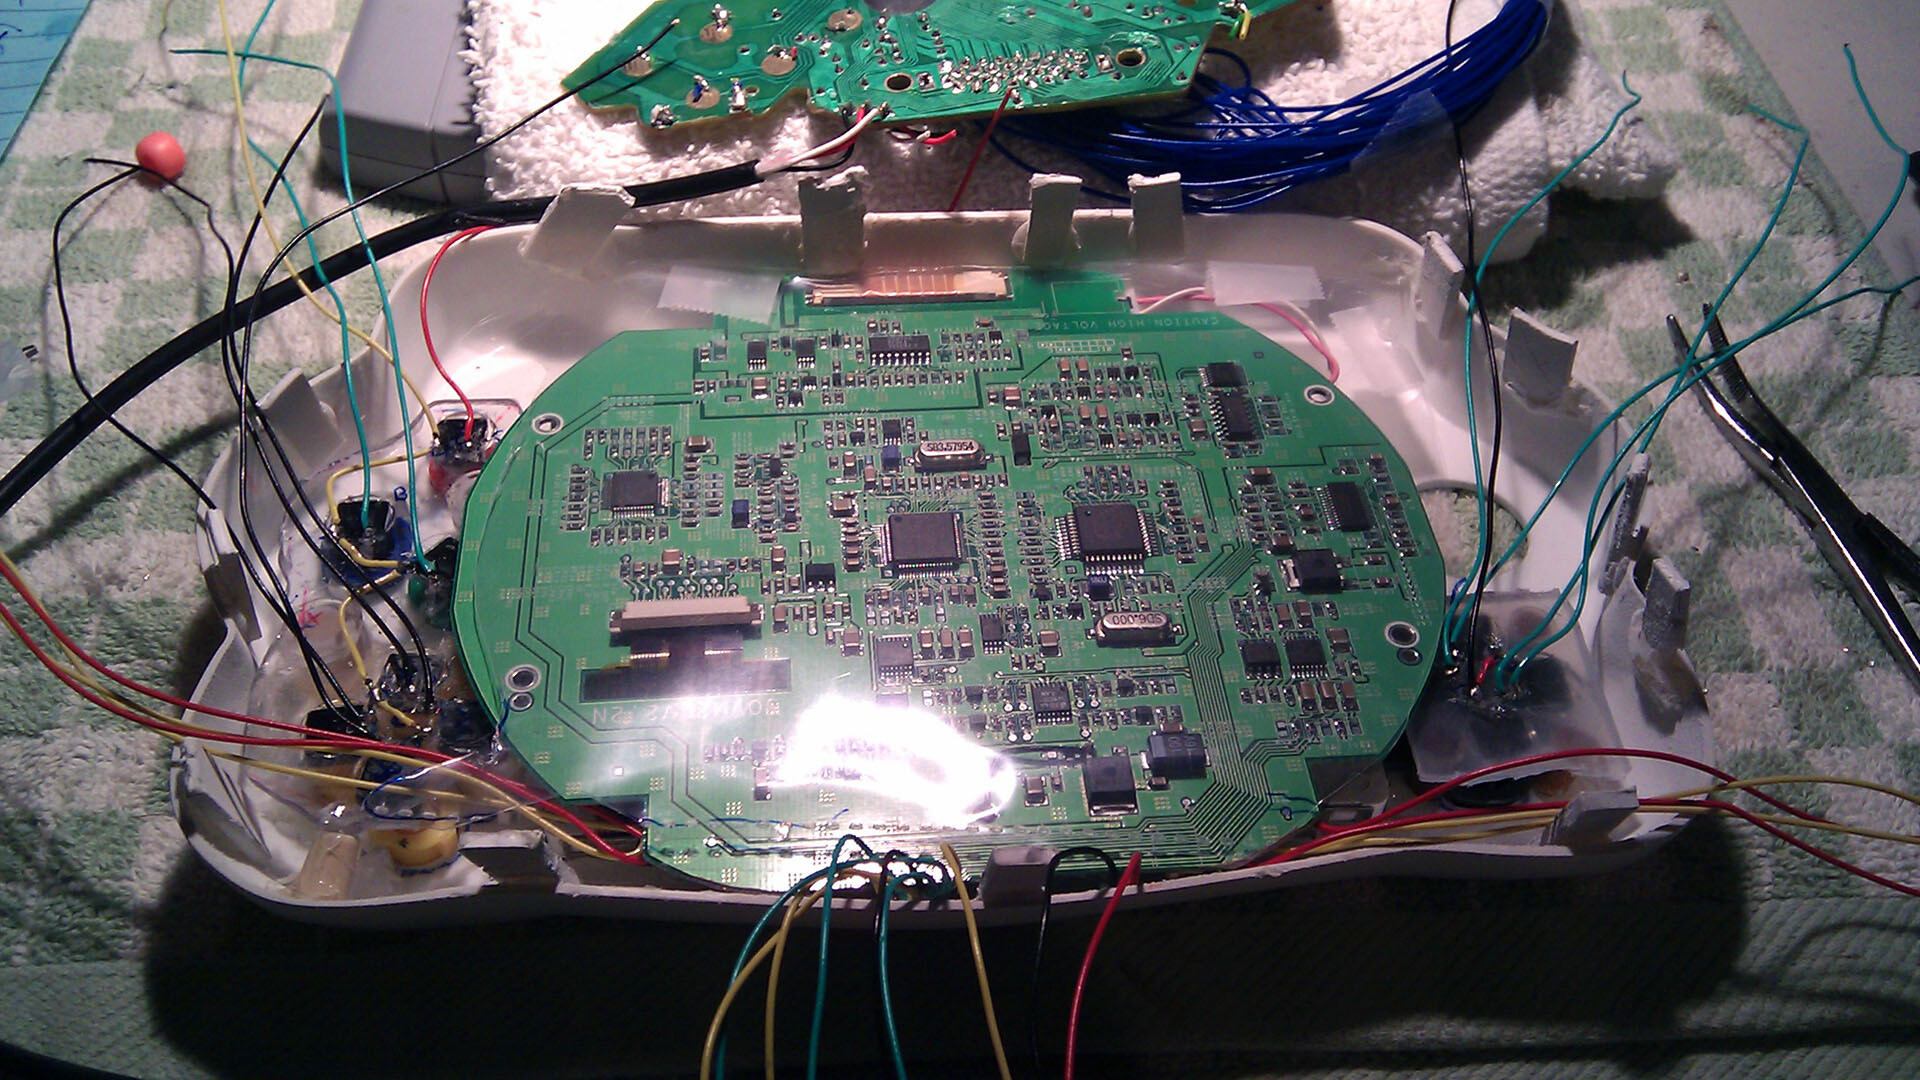
The smaller form factor required new cooling solutions. These mini heatsinks combined with an integrated fan (see below) kept the N64 cool. The N64 board has 2 voltage channels that require different voltages (12v and 3.3v). The batteries can power the sc
The N64 board is placed into the back half, and the cartridge slot glued in. Another insulating layer is placed between the screen, controller board, and N64. The voltage regulator is insulated and everything is packaged up and glued-in.
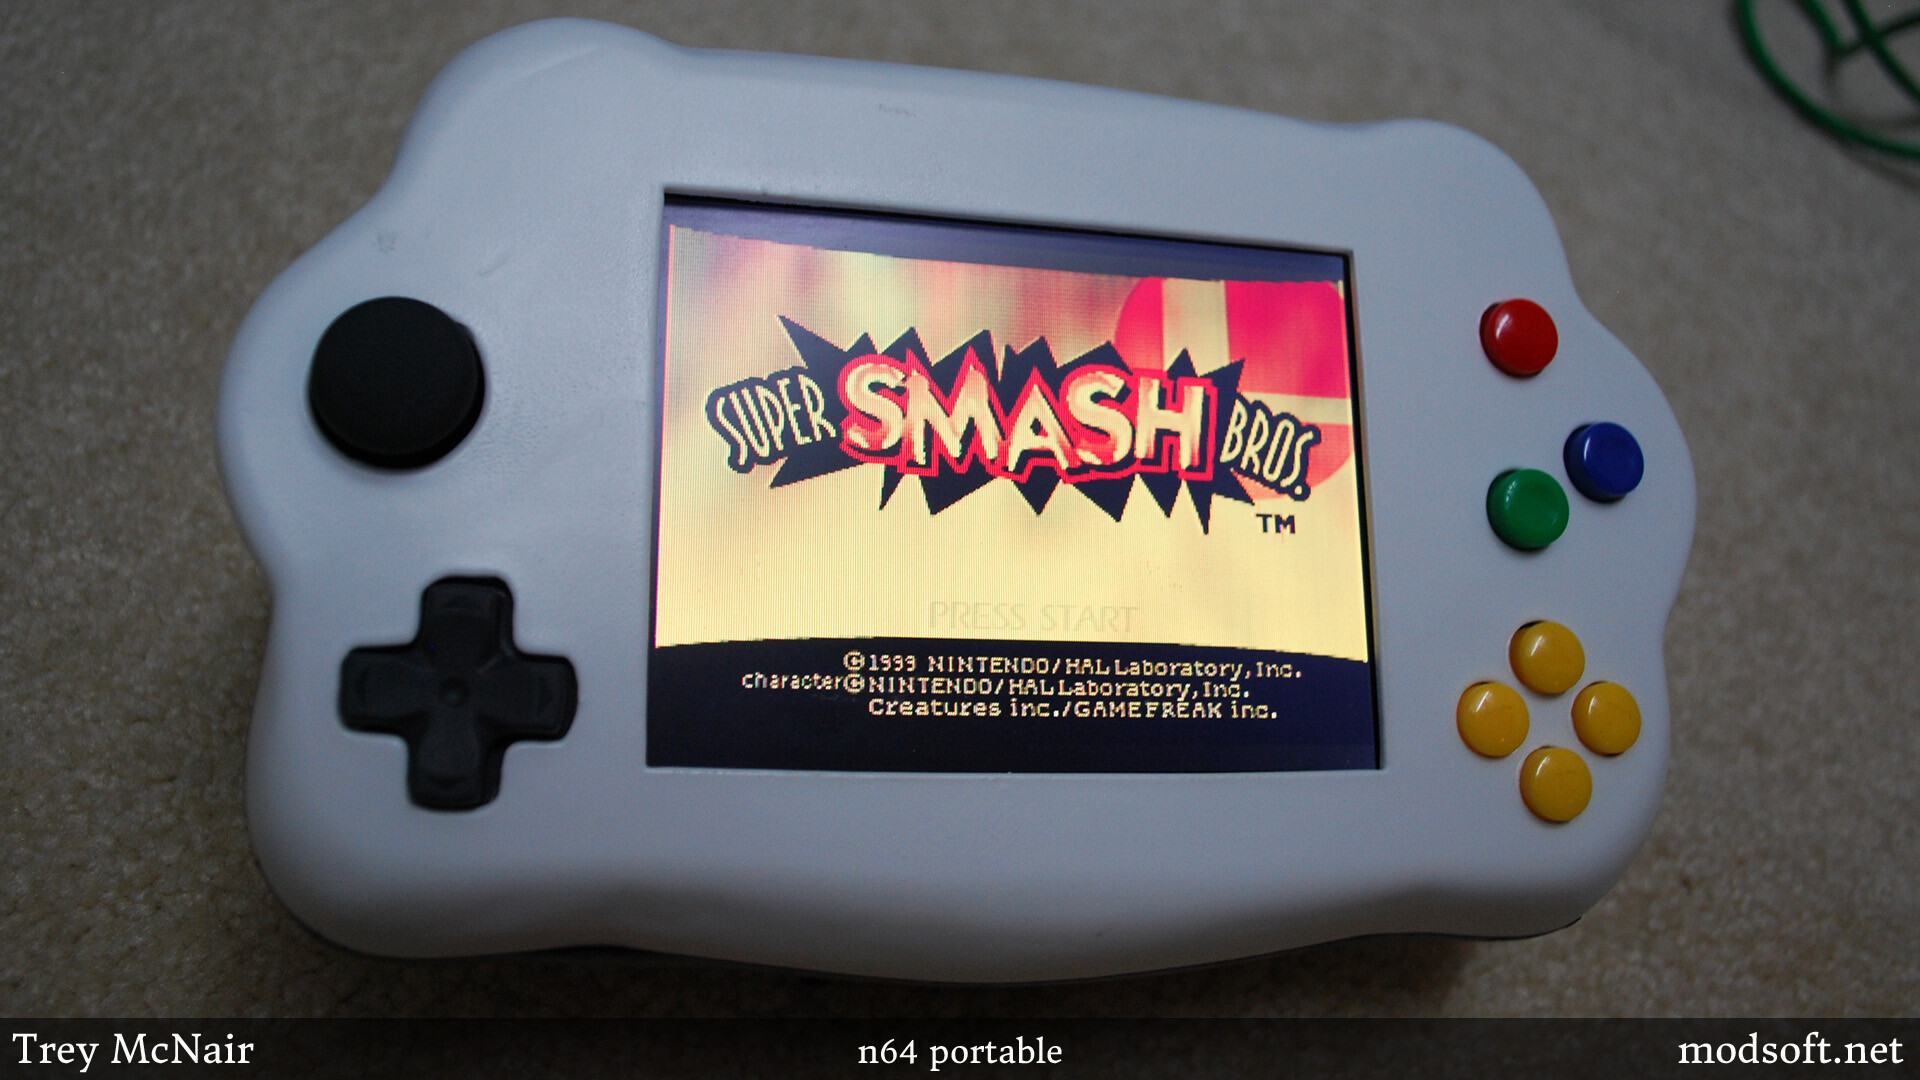
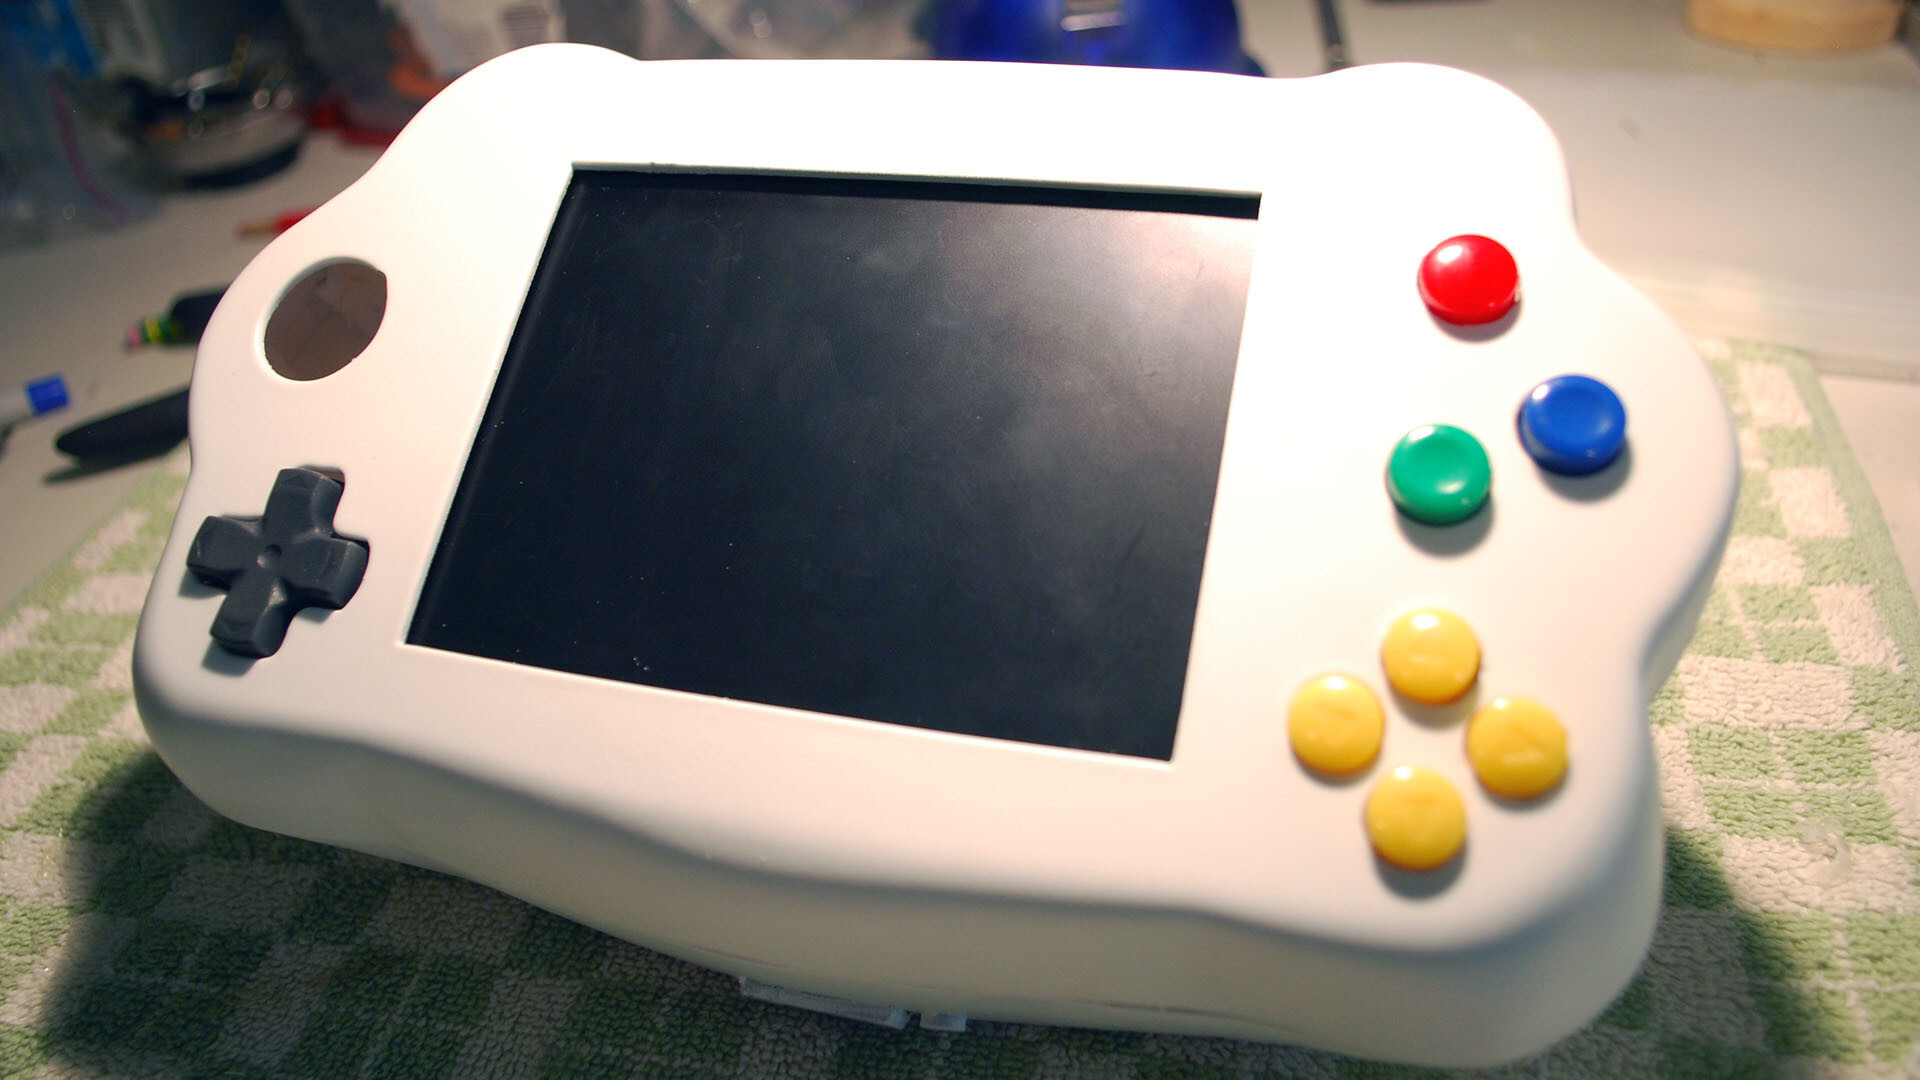
Custom built, fully functional Nintendo 64 portable, embedded LCD screen, controller, batteries, and cooling solution. Huge thanks to (bacman) for pin-outs, helping me acquire parts, and moddedbybacteria forums for support
Cartridge slot reorientation,
New heatsinks, custom battery powered setup
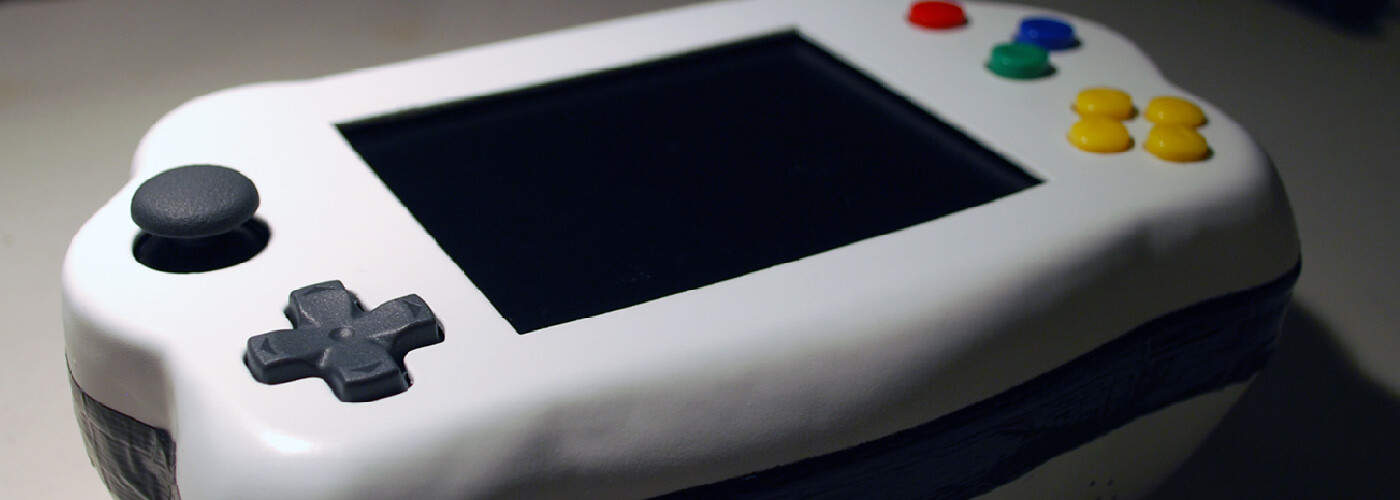
Finalize case and button installments
Button wiring, components layout and wiring
N64 board installment and final wiring/packaging


